Tuesday, October 29, 2013

BeWitching~Scraps Of Darkness October Kit~Gothic


Hello, and welcome to the official Scraps Of Darkness Design Team Reveal for the October Kit~Gothic!!

If you love all things Halloween, then this kit is definitely one for you!!!

Here is a sweetly, spooky little Vintage layout that I created using this month's kit and some of those Bat~tastic Add Ons! The Vintage image is one that I found on Pinterest, then I color altered and did some major cleaning up on.


I layered in the first two piece of kit papers. The second layer is one that I distressed
and glittered the edges with the Distress Glitter that was in the kit. I then layered in another layer of paper and a layer of the glittered up bat paper that was in the kit. I then distressed the edges of my photo and two tone inked them. I then randomly stamped with a crackle stamp from a past kit to add lots of depth.


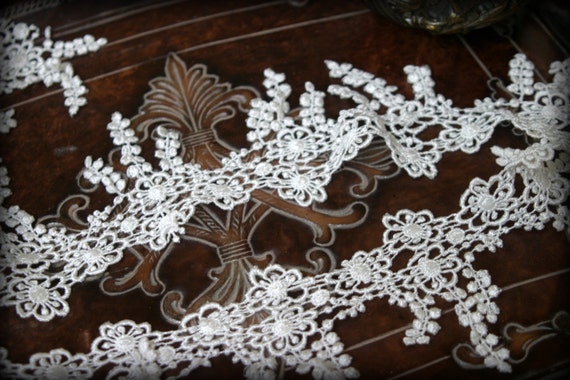
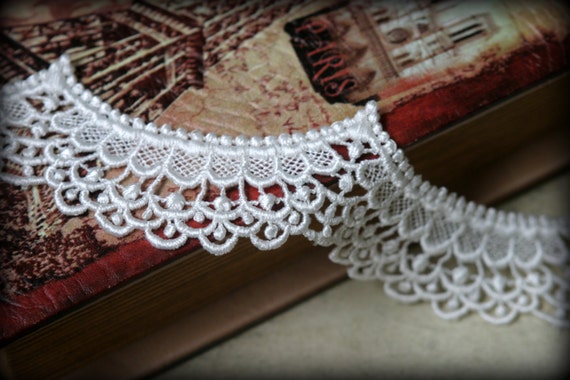
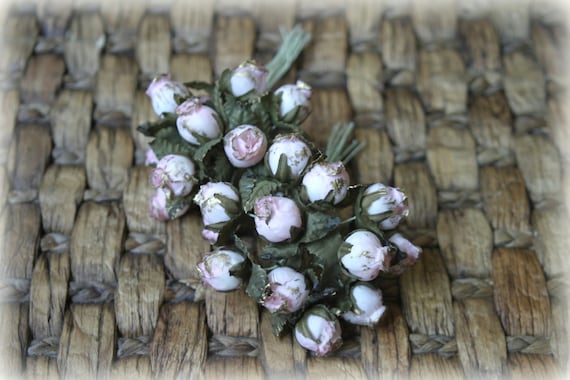
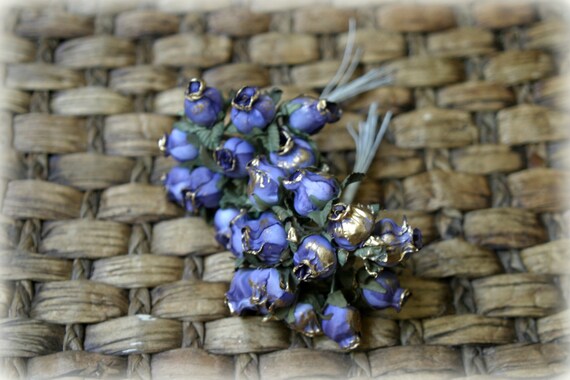
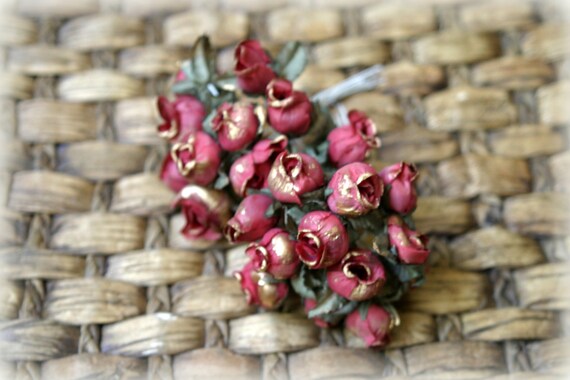
I ran the yummy trim from the Embellishment Add On across the bottom of the layout, added on some past kit flowers, and some flowers from the Floral Add On, as well as some of the flourishes from the kit. The Bewitching Halloween Banner is a die cut piece from the kit applied with foam tape for dimension. 
The Witch's Brew Butterflies are from my Reneabouquets Etsy Shop, and feature a hand painted spider web design on the lower wings. 


I took cheesecloth and pulled lots of strands out of it to replicate a spider web then misted some Scrapmatts Chipboard spiders from my DT stash, and popped them in. The Candelabra is a wooden piece from the E.A.O. that I first misted, then painted with Micas, melted fusable webbing onto and then inked it for dimension and texture~a technique I picked up from Joyce Lawrence (Joycekers) a few months back on a project I had seen her do~thank you Joyce for your inspiration!


Here is a close up of my floral work.


And here are some close ups of the chipboard and cheesecloth textures.


This next project is a File Folder Tag Album. The base is actually cut down manilla file folders that I sewed together to form multiple pockets for tucking over sized tags into. This system works to create a unique "mini album" system, with 7 different double sided tags perfect for adding photos to and spots for journaling. You can also tuck more photos or memorabilia into the pockets themselves. I give full credit of the base design to Cherry's Jubilee. She does gorgeous work and I encourage to give her blog a visit, you will not be disappointed!


For the front of the folder a layer of paper from the Paper Add On that I distressed and inked. I then cut out one of the labels from a piece of the Authentique papers, distressed and heavily inked the outer surface. I then took a little Vintage Image that I had gotten from Magic Moonlight Studio that I digitally altered then glitter painted and added her on.


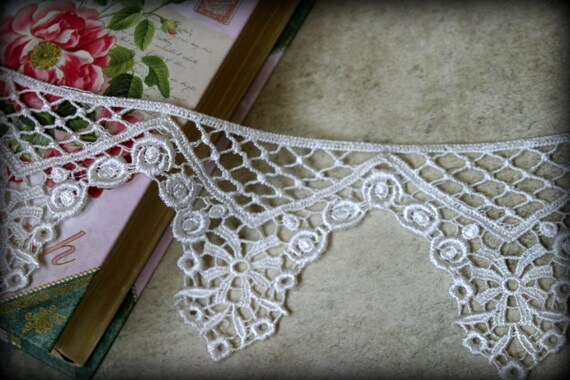
The gorgeous, black lace trim was from the Embellishment add on, the seam binding is some that I hand dyed to match my layout and then added on a stash rhinestone button, and a feather. I then tucked in the little "Hocus, Pocus" die from the kit that I added crystals to and tucked in the oh so FAB, handcrafted stick pin that was created by Mandy Harrell just for this kit and comes in the EAO.


I cut out another label tag from the Authentique paper added on another seam binding bow that I topped with a flower from the kit, and clipped it to the front with a stash 7 Gypsies clip accented with a clear crystal. The Little Pumpkin Glitter Glass Butterflies are from my Reneabouquets Etsy Shop.


I created 6 more tags by punching, distressing, and sewing papers and adding on various cut outs from the paper, seam binding bows, and scrap trim pulls. 


Here is the system with all the tags pulled out. Each tag is double sided.


And here is a view of the back.


It is always such a Treat to see what Melinda is going to put together for Halloween!!! I just love all the spooky meets gorgeous elements that she gives us and it makes for such a fun time over in the forums, blog and Facebook Page.  On our Facebook page, there has been lots of fun games and chances at giveaways, so be sure to head over there and check it out!!! 

I hope you and your's have a fun and FABulous Halloween! Now, it is time for me to jump on my broom and fly on out of here!! Sweet,  sticky, candy covered  hugs~Renea


Monday, October 28, 2013

Nutcracker Christmas Nook Book Box~Featuring Tresors De Luxe

Today, it is my pleasure to show you an altered nook book box that I created for the Tresors De Luxe Etsy Shop! I created it using Graphic 45's Nutcracker Sweet line and lots of those gorgeous Tresors laces and flowers. 


I started with a little box that I painted first with gesso, then with Jacquard paint, then a layer of crackle, then a layer of  acrylic paint. I then walnut stained on top of that to create a worn aged look.


I painted an old cabinet handle that I found in my junk drawer, and added it to the spine of the book.


Here is a shot of all the dimension and crackle.


The front is covered in layers of distressed and inked papers and combo stickers, then I layered on two different laces one at the top and one at the bottom. 

Ivory Venice Lace LA-025


Ivory Venice Lace LA-098


The resin window is a Prima piece layered with G45 paper, and I fussy cut out the Nutcracker banner, Clara and the clock, accenting them with glitter paints, and glazing the face of the clock so that it looks like glass. The handle is a G45 Metal piece, and the I added a mulberry paper rose, and lots of those little fabric roses from Tresors, as well has some hand stamped and fussy cut leaves. 


Pack of 24 Light Pink Fabric Shabby Chic Rose PF-017


Pack of 24 Purple Fabric Shabby Chic Roses PF-021


Pack of 24 Red Fabric Shabby Chic Roses PF-020


Here is the inside of the book with all the little "nooks" that I just love to do!


On the left, I layered on distressed and inked G45 paper and more of those delicious Tresors Laces. I fussy cut out the Nutcracker and glitter painted accents on him. The little sign is a G45 sticker accented with Jingle bells, and I repeated some of the flowers from the outside. 

Ivory Venice Lace LA-017


I created some little Sugar Plum Fairy Nooks. This one is some G45 paper layered with some of that amazing dangly Tresors lace, a fussy cut fairy with glittered up wings and tutu and a little Tresors Fabric rose.

The other side is layers of G45 papers and a Tresors Fabric Rose.


I created the look of a stage here with G45 papers and a sticker header, Tresors Lace and fussy cut pieces accented with glitter paints. 


And here is a shot of the back of the book.

Tresors De Luxe makes creating something special for Christmas or any Holiday so much fun!! I love all the versatile looks you can get from the products, especially this Vintage Christmas look. I encourage you to stop by the Etsy Shop  and check out all the new items that Lucy has been adding. There are some gorgeous rhinestone brooches and buttons, more new laces and trims, lots of different sizes and styles of flowers, plus some sweet little birds, bees and sprays, that are so perfect for making your projects~something special!

If you stop in to shop, don't forget to mention that I sent you and you will receive a sweet little early Christmas present for yourself~ Hugs ~ Renea

Sunday, October 27, 2013

Scrapmatts Chipboard~Color Our World With Autumn Hues And Christmas Golds

 Hello everybody and welcome to my monthly Scrapmatts Australian Chipboard Reveal!! This month Angella gave us DT, the  Criteria of "Color Our World", and I chose to scrap the colors of Autumn or as we say here in the South, Fall. I just love all the browns, golds, greens and terra cottas of  the changing season~earth tones are my favorite colors :)

The photo is being used with permission from my German Friend,  Meli, who is a model, costume designer and digital artist and the photographer for this photo was Reiner Eisenbeis. You can check out Meli's work  here:


I used layers of  papers that I distressed, tore and painted the edges with Glitter Glam. 


I then took the Scrapmatts CB2007 Page Borders 06 
and painted it with Art Anthology Texture Gel really thick and then heated it up with a heat gun to get a really textured finished, and tucked it into the torn layers of my page to add instant glamour. 


I then gave a CB4056 Ornate Frames 13
the same technique treatment and layered it on, and placed Meli's photo on top.


I took different colors of glitter glam and dripped them below the photo.


I added in Tim Holtz Metal buckles that I tied hand died twine onto, and layered in Pearl Flourishes,  lots of flowers and leaves, including some of my hand crafted Terra Cotta Texture Roses from my Reneabouquets Etsy shop.


Here is a close up of all the texture on the frame. The Quote "Unlock the window to your soul, and let your dreams soar" was Kaisercraft rubons. 


I finished out the layout by adding on a set of my hand crafted Tiger Lily Butterflies for lots of dimension.

I just love the Scrapmatts~Page Borders and Frames!! They make putting together something special a breeze and they have so many different styles that there is something for everybody.

Next, I have 2 Christmas ATCs that I created using mostly golds. I love Christmas golds and greens, they are so elegant!


I started with two of the Scrapmatts  ATC10-002 Arch 01
I then covered both the front and the back with some leftover Bo Bunny papers that I distressed and inked the edges on.


I then wrapped both ATCs with some Vintage Crochet lace, created some hand dyed seam binding bows and added a Jingle Bell to the center and a Scrapmatts  CB1215 Scrap Words 17 that I inked the edges on and added a pearl center to.


The ornate piece is a Tim Holtz Book Plate that I sponge painted with Jacquard Pearl Dimensional Paint and heat set to get the yummy texture and so that it would adhere to the metal. 
The reindeer is a Scrapmatts CB1095 Reindeers 03
that I first coated in Lindy's Magical Micas then I used rubons to create the design, painted accents with Ranger Pearls, and after everything dried, I then glazed the deer for shine and durability. I then popped on a bloom and some fussy cut hand stamped leaves.


Here is a shot of the back.


And here are some shots of the 2nd ATC.


Thank you so much for joining me!!  I just love my Scrapmatts Chipboard and I hope that I have inspired you to break yours out and to try something new ~Hugs~Renea


Tuesday, October 22, 2013

Under The Spell Of The Scraps Of Darkness October Kit~Gothic~


Yes, it is that time of the year~time for the Scraps Of Darkness Halloween Kit Reveal!!!! You will be completely under it's spell from the first moment you open up the box!! It is simply Wicked Divine!!

The following is the totally Spooktacular Sketch done by the always inspiring Sue Pup, just for our kits:


And the following is my take on the sketch:


It features a photo of Natalie Portman in the movie "Black Swan". Last Halloween, my husband, David, surprised me by bringing home a movie. He said that he thought it sounded like something I would love. He said, and I quote, "it had two of your favorite things in it, Ballet and crazy!!" LOL~ you gotta love him~he knows me so well! Well, he was right, I loved it, it was beautiful with all the ballet, and crazy with the psychological thriller aspect~yep, right up my alley.


I did lots of technique work that includes, distressing and tearing the edges of the paper then painting them with Shimmerz Texturez Paint, then adding Glass Glitter and seed beads. 


I made tears in the paper and repeated the texture paint, glitter and seed bead edges and then added some of the little mirrors from the kit.  I did some stenciling with modeling paste and added the really FAB pearl colored stones to accent it.  The matte behind the photo is misted then Shimmerz painted, corrugated board that I dusted with Glass Glitter and seed beads.


I added in a large feather from a past kit, some hand painted, die cut foliage, some cheesecloth, feathers from the Kit, a stash white flower that I added a brooch to, and some of the flowers from the Floral Add On.


For the title work, I took one of the stickers from the Embellishment Add On and added crystals to the edging and flourish.

I just love Halloween, it allows me to put my wicked side on and get a little darker than I sometimes do. Getting your Mad Muse on every once in a while can be so much fun, and allows you to be creative at a whole different level~so grab your kit and  go get your Mad Muse on, and have a little fun!! Happy Halloween!! Hugs, ~Renea