Monday, August 20, 2012

Scraps Of Elegance Blog Hop Announcement & Round Robin Layout

Hi Everybody!! Scraps of Elegance is having a blog hop, and I would like to personally invite you to come hop along with us!!


O.K. so summer gets really hard for me, and I don't get to join in on as many challenges as I would like to.  But now that my son is back in school and I have lightened my DT load, I am so glad to have gotten to play along with some of the fun challenges that are hosted over in the  Scraps of Darkness/Scraps of Elegance Forums. One of those challenges is the Round Robin hosted by Jennifer Snyder (JRABS), and it is always a blast!

I was on Team One, and my Dark DT Sister, Michelle (Bubbachooka) kicked off the Round with this gorgeous Vintage layout:


And then the, oh so creative Lee, took Round 2 with this yummy, Vintage layout:


So I took both of their interpretations, meshed them together, and came up with this Vintage Inspired Layout:

I just love playing along with these types of challenges, and hope that you find the time to enter into a challenge or two of your own!! Happy Scrapping!! ~Renea

Wednesday, August 15, 2012

Scraps Of Darkness August Reveal


 Scraps of Darkness just revealed it's August Kit, Jamaican Sunset, and it is so packed full of yummy, summer colors and embellishments, you will find yourself lost in the endless possibilities of directions you can go! Whether you love technique, girlie grunge, Vintage, masculine or mixed media, this kit, teamed with the amazing add ons this month will have you creating project after project.


The main kit includes the following:
Papers:
My Minds Eye Indie Chic - Ginger Adventure Boquet, Direction Brocade, Nutmeg Family Laurel Burst, Hanging Out Roses
The ScrapCake- Summer City, Banana Boat, Sunny Delite Blue Lagoon, On the Beach, Watermelon Splash, Paradise

And the following Embellishments and Items:
Lindys- Mango Mania, Webster's Pages blue ric rack trim, Prima Velvet Rainbow Vintage- Indie Chic-Ginger Travel Garland- Indie Citron Grow Border Stickers, Flourishes with a Bling- Jasmine Teal, Websters Fabric Tickets-Palm Beach, Indie Chic Time Label, The Scrapcake- Summer City Alpha, Studio Calico Mr. Huey Mask- Chevron

Each Kit comes with a gorgeous sketch created by our own Sue Pup that is always inspiring!


And here is my take on that Sketch (I flipped the sketch 180 degrees to fit how I wanted my photos to look):


 This layout features lots of technique and represents how you can use the kit to create a super feminine, shabby chic layout. Over in the Scraps of Darkness/Elegance forums, Lisa (Raining) hosts this amazing challenge called "Skeleton's In The Closet". This challenge's theme is "Escape" Asking how we escape from life. Well, as you can see, my escape is books. I started reading at the age of 4 and all through my childhood books helped me to escape my very dysfunctional home life. As a teenager they took me places I could not afford to go, let me meet characters that I never would have met and in general were my favorite past time. As a young adult they educated me, taught me alot about myself and helped me to understand so much about who I am, and the world. I am still an avid reader, and prefer a good book to T.V. or the movies any day. I swallow books whole and can sometimes be found reading more than one at a time. I love books!!!

I used lots of technique and layering on this layout, and the base layers are lots of those delicious Scrap Cake papers from the kit and paper add on.  The photo is one that I found on Pinterest and then recolored to create two different looking images from the same image.

I distressed almost every paper on this layout, and the middle base layer is a piece of cardstock that I covered with tissue paper and then edged with the gesso that was in the Creativity Add On that Melinda offered this month, and then glittered heavily. I used lots of lace and cheesecloth to add softness. I randomly punched some of the edges, and here you can see where I stamped the top corner using puff paint to get even more dimension and texture onto my page. There is also a corrugated board layer that I covered in gesso and glittered the edges on.


 I layered the thank you card that Scrap Cake sent us with their papers and then layered on a Scrap Cake Die Cut from the Romance Add On. The flowers and leaves were from the Flora & Fauna Add On that I mixed in with some Shabby White Texture Roses from my Etsy Shop.


 At the bottom of the photo, I tore the paper off, and then added in lots of layers of tissue paper, lace and cheesecloth.


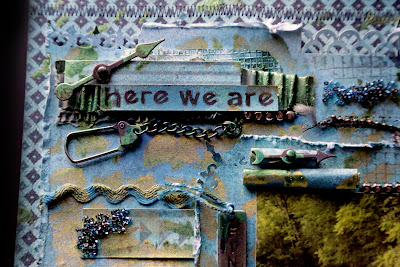
 Here you can see a better shot of the gussied up corrugated piece that I created and tucked into the punching of the layout. The title work was created using some of the Scrap Cake Die Cuts from the Romance Add On and the Scrap Cake Summer City Alphas that were in the kit.


 To add even more dimension, I added a set of my Soft Pink Baby Renea Butterlies from my Etsy and lots of bling from my stash~


This kit so screamed "I want to do lots of mixed media work!"  to me, and I just couldn't resist doing some of that masculine work that I so love.

 I used the Girlie Grunge August Challenge Sketch to create this layout, and it features a photo of my son, Draven and our dog Jack when we were on a hike at one of my favorite place to run and hike, Greenway Farms. It is a gorgeous park that runs through the fields, up the ridge and through the query about five minutes from my house. My son and I took the day and just shot lots of photos and hung out together, a very perfect day for me :) I started with a layer of the My Minds Eye paper from the kit, then took a piece of Scrap Cake paper cut it in 1/2 and then cut a strip out of the center, distressed the edges, set eyelets and connected them using some ball chain. I then took another piece of Scrap Cake paper and distressed it, then punched the corners and used it for my photo mat.

I layered in tons of texture and detail; Mesh panels, corrugated board, metal spinners and clips,  and some of the My Minds Eye Indie Brad Pieces from the Romance A.O.,   ric rac trim from the kit, rolled paper pieces, seed beads from the Creativity Add On. I then remove the photo and misted the whole layout with the Lindy's mist from the Color A.O., Dylusions mist from a past CAO, and some stash Tattered Angels Mist, layering in the colors.  I then took some of the Jacquard Lumiere Paint from the Project A.O. and dry brushed it onto any place I wanted to add that shimmery color (the photos do not do that paint justice).

 I cut lots of Donna Salazar Sprightly Sprockets out of corrugated board that I had misted with the Lindy's mist from the CAO and added eyelets and brads to them and set them at the corners and around the photo.


 I added some Tim Holtz Metal Gears to the centers. Layered in ball chain and fibers (from a past kit), and some of the Webster's Pages Beaded Trim that I cut apart for lots of metal shine.

 I then added some stash Tim Holtz Word Sticks and tied some of the twine from the Romance add on. I went over the letters that had gotten faded from all the color layers with a Tim Holtz marker so that you could see the journaling.


I love the way this layout turned out, such a wonderful way to capture that day!!


 For this layout, I wanted to create a fun, collage feel. It features a photo of my son, Draven when he was about 2 1/2 playing in his little kiddie pool.

 I did lots of stamping, using the gesso and Lumiere paint that was in the Creativity Add On. The little word circles are some of the Scrap Cake Die cuts that I backed with burlap.


 I used a stash Acrylic Block and stamped it with the Heartfelt Creations Crackle stamp from the Color Add On, then embossed it with some of the Antiquities from the same AO. The little fabric tickets tucked in, are the Prima Tickets from the kit, and the yellow flower is from the Flora & Fauna Add On.

I created some visual interest and texture by setting some of the Indie Brads from the Romance A.O. and wrapping them with the twine from the same add on. The zig zag was fussy cut from some of the Scrap Cake paper, and I then layered on some of the kit ric rac, and added the tag, and brad from the same Indie Brads.


The Florish With A Bling from the kit was perfect to replicate water and the wave pattern.


I created a collage with lots of texture, by painting an area with gesso (from the project A.O.) and snow tex then layering on a Indie sticker from the kit, some sea shells and some pieces of acrylic that I broke a part and alcohol inked.

This turned out so fun and cute, perfect for that sweet,  toddler photo of Draven!

When Melinda let us know that she would be carrying an extra add on this month and that it would be a technique based, Creativity Kit, my hand went immediately in the air, and I said, "me, me, I want one, oh do I want one!" Was I ever so glad I got in on it, because it was loaded with mixed media goodies that this technique junkie dove into first thing!!


I first took the 5 x 7 canvas from the Add On and painted it with the Lumiere Paint, I then layered fiber onto the canvas and covered it with tulle. I then used the Chevron Stencil from the kit and modeling paste from the Project add on to create the pattern, with the stencil still on, I painted the design with another color of the Lumiere paint, and then sprinkle it with the seed beads that were also in the Project add on. I removed the stencil and then painted around the edges of the pattern with the 3rd color of Lumiere paint.


I took a mermaid image that I found via Google, fussy cut her out, sprayed her with adhesive and sprinkled her with glitter, I then added crystals, pearls and a little flower from the Romance Add On and one of the little metal flowers from the Project add on that I set a Swarovski crystal in.


I attached some stash beaded trim at the bottom and then added a spray from a paste kit, a jeweled flower from a past kit as well as one of the some of the flowers from the kit and one of the resin ones from the  Romance AO. I then added on some seashells for lots more texture.


I took a large Sea Shel and painted the edges with some of the Lumiere paint, then using glossy accents, puddle some of the seed beads, Vintaj metal pieces and Swarovski scrystal into the bed of the shell. I alcohol inked the metal lady on the moon and star pieces and added them to the shell. I created my title and then added on some more flowers and shells.

I loved playing with this Project Kit!! The colors are amazing! My photos really don't do them justice. It has been so dark and rainy here all week and I couldn't get really good shots without shadow, but the colors are so vibrant and shiny. The whole add on was a technique junkies dream, so I was truely "Dreaming In Color".

Thank you for stopping by for reveal! I hope you get a chance to check all of my other talented Dark Sisters work with this amazing kit. Until next time  ~Renea


Thursday, August 2, 2012

Love Letters Altered Memory Box

TGIF Everybody!! Time for another Berry71Bleu project reveal. I am so excited to announce that Scrapmatts is our sponsor this month!! My Berry Bleu sister Cathy Cafun is hosting the challenge this month and the theme is wings! Here is the information about her challenge;

 For this challenge there is only one criteria - I would like to see any form of wings on your LO, Card or OTP project.  Can be one or many forms, whatever you like as long as I see some wings.  Here are some examples to get you started - fairies, angels, birds, winged insects, dragons unicorns and bats. 

This month our sponsor is:
and they have donated a fabulous chipboard pack as the prize for our challenge winner.  Click on the link above and check out all the beautiful chipboard designs available in store.  Scrapmatts also have a fabulous gallery with so many gorgeous creations which are sure to inspire you.
The prize above is for our merit winner. We also have a prize for our random
winner too. That prize is sponsored by Zeus and Zoe - Marivic's Kit Store.
You can win this entire pack of keys! They are gorgeous!!
To win this random prize everyone has an equal chance, just by entering!
RULES
1. You are allowed to make a an altered/off the page project as long as you follow the challenge specifications.
2. Projects must be linked up to our linky tool in the sidebar, using the URL of the ACTUAL POST not your entire blog.
3. You may submit as many entries as you want and combine your entry with up to 2 other challenges.
4. It is required that you mention in your blog post that you are playing along at Berry71Bleu TOGETHER with a link back to our blog.
5. All entries must be received by MIDNIGHT EST on the 31st day of the month the challenge was posted.
6. Entries to be submitted via the linky tool at the top of the sidebar ONLY, not by e mail and not by linking up in the comments section please.


And here is my project based on Cathy's Challenge:


 I used a mix of some past Scraps Of Elegance Kits, along with one of Marivic's gorgeous tags  to create, an altered memory box. I love anything soft, Vintage or Shabby Chic, and these boxes are perfect for storing those little memories in.


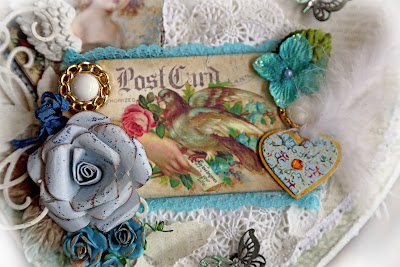
  I, of course, used my Berry71Bleu tag as my focal point. With that gorgeous Vintage Post Card image of a dove, it was perfect for the "wings" challenge. I layered it on top of a couple of varying sized Doilies for a lacy soft mat. I added a feather, a die cut foliage and swirl piece and a few small Prima roses to compliment the tag and add lots of charm to the box.


 I then took some Vintage Charms pieces and layered them in under the corner and added a little resin wing to the girl image.


 I took a small ScrapMatts butterfly and embossed it, then added some little crystals to the body and popped it onto the top corner.


 I then took a second ScrapMatts butterfly and added it to the bottom.


 For the lip of the box lid, I added some Vintage look lace. The box was first painted with gesso, then inked and then stamped with a Vintage script stamp to add layers of very soft color. I then added some swirls and two larger ScrapMatts Chipboard butterflies that I also embossed and added crystals to.


 Here is the opposite side.

I just love working with chipboard, and if you have never checked out ScrapMatts Chipboard, I encourage you to do so. They have so many wonderful and unique designs!  Sofie Rossides is just the sweetest and all the girls over there are so very talented and inspiring. Their beautiful chipboard pieces, along with that gorgeous Berry71Bleu tag made creating this project sheer heaven!!

Hope you get to come play along for a chance at those FABulous prizes!!  Thanks for dropping by! ~Renea

Wednesday, August 1, 2012

Scraps Of Elegance August Kit Reveals!!


A brand new month equals a brand new kit reveal over at Scraps Of Elegance!!

The August Kit-Summer Haven is just that-a soft, romantic haven from the harsh summer sun!! It is loaded with papers from:
Kaisercraft- The Lake House- Break, Serenity, Villa, Spa, Springs
Fabscraps- Organic Herbs, Script, Tree, Lace
Teresa Collins- Sweet Afternoon- In the Garden, In the Attic
 and includes the following embellishments:
 MME- Dolled Up Favorite Title
Teresa Collins- Sweet Afternoon Die cut Accessory Sheet
Kaisercraft- The Lake House Rub Ons, The Lake House stamp
Prima- Shabby Chic Treasures. Charms, Meadowlark roses, Say it in Crystals (pink)
Fabscraps- bird chippee
Reneas butterflies
Pink crinkle ribbon
Team the main kit up with the Embellishment Add On and the Floral Add On and you will be scrapping page after page of FABulousness!!

With each kit, you will receive an oh so inspiring sketch from the most talented Sue Pup! Here is this month's sketch;

And here is my take on it;


 I flipped the sketch clock wise and then went to work. I layered in layers of Fab Scraps papers that were distressed and punched. I then cut out an open circle, layered it in, and then took some Prima packaging pieces and cut out all of the distressed clocks and added them on.

 I then took a Vintage Image and tore the edges then inked them with two different colors of ink and then brush painted them with Glitter Glam to create a really aged look. The title "Timeless Beauty" was created using some stash Alphas, mounted onto Prima packaging that I distressed the edges on and inked.

 I added on a stash piece of Fab Scraps Chipboard that I painted with Espresso Glitter Glam and then randomly touched places with Golden Goddess Glitter Glam, I then added small beads randomly onto the chipboard to add texture, and layered in some Vintage Crochet Lace behind the piece. At the top of the photo, I took apart the Websters Wonderfall floral bouquet from the Floral Add On and added one of the flowers and some of the leaves.


 Next, I took the Fab Scraps Flying Bird On Swirl Chipboard from the kit, painted it gold and then stamped it using the Kaisercraft Lake House Clear Stamp from the kit. I added on another piece of the Webster's flower piece that I tore apart and then tied on some of the gorgeous Prima Genie Stones from the Embellishment Add On.

OK so I did a double squeeel this month!! First when I got my kit and second when I saw that there was an Acrylic Mini Album in the Embellishment Add On. I love to alter, but had never done a mini, so I was super excited to get to try my hand at it!! Thank you Melinda!!!

So here is my first mini album attempt, and I have to say I love how romantic and shabby chic it turned out!

 I wanted the theme to evolve around the Mark Twain Quote that was on one of the Kaisercraft pieces from the Embellishment add on, and chose Live as the all encompassing title for the album. 

 I first, painted the pages with white gesso, and then swirled the paint with my fingertips to get a really smokey look. I then  edged all the pages out with glitter for a universal theme and then got started on making each page unique. I put the pages together with the rings included with the album and then tied on some white trim with beads, sheer ribbon and some of the Prima Gypsy Stones from the Embellishment Add On. ( I love those things!!)

I stamped the front page with a script stamp and then painted a corrugated board piece with white gesso and then added patches of glitter that matched the edging on the page. Next I layered on some cheesecloth for softness and then started adding on my embellishments. 
 I sponge painted a Dusty Attic ATC frame, from the SOD/SOE store with 2 different colors of paint, added a feather from a past kit and then some stash mini roses as well as some from the kit and then tucked in a little metal wing, and added a pearl accent. The flowers on the side, include another kit rose, a mini rose, and a Shabby White Texture Rose from my  Etsy Shop.


 I layered on some crochet lace, then cut the word "Live" from the kit paper and put it into a stash Tim Holtz Book Plate and added some more pearl accents. To finish out the front, I added on a Baby Renea Pink Lemonade Crush Glitter Glass Butterfly from my Etsy Shop.


 I centered the first inside page around the following part of the quote; "Dance Like Nobody's Watching." I used the painted acrylic as the background, applying glitter in random patches for texture. I then layered on some piece of the Kaisercraft papers that were in the Embellishment Add On and topped them with a Shabby Chic Image of Tutus and Wings. I added a white feather from a past kit and then popped on one of the flowers from the Floral Add On and some stash leaves. I cut out the sentiment from the Add On papers, inked the edges and then added a Sweet Afternoon Teresa Collins piece from the kit with a pearl accent. That yummy pink trim was a gift from one of my Scrappy Sisters Michelle (Bubbachooka), and was so perfect to add softness and texture to this page. Thank you Mish!!

 The opposing page is centered around the "Sing Like Nobody's Listening" part of the quote. I stamped on to the acrylic with a music note stamp, then layered on some pieces from the Embellishment Add On Kaisercraft paper, accented it with pearls, and cut out and attached the sentiment. I fussy cut the birds from some of the papers and then fussy cut out another set, attached them with foam tape for dimension and then added Stickles for shine. The branch is a Dusty Attic Foliage Piece that I misted and then added some hand tinted mini roses onto.

 The next page evolves around the "Love like you've never been hurt." part of the quote, and features layers of the Add on Paper that I distressed and added cheesecloth to. I then popped on a Romantic, shabby Image, added one of the Prima Resin pieces from the kit to the corner, attached a mini rose and some leaves, the cut our sentiment and a sweet mini Dusty Attic lock and key that I texture painted.


 The last inside page finishes out the quote with " Live like it's heaven on earth." , and features a layer of the Embellishment A.O. paper with a fussy cut frame from that same sheet, cheesecloth, a mini rose, a pearl accent, and one of my English Tea Rose Butterflies that is included in the kit and that you can find in my Etsy Shop.


For the back side, I stamped it with the script stamp and then painted it in places with crackle paint to give it an aged look.

I have a feeling, I will be doing more of these in the future, and love that Melinda introduces us to so many amazing techniques and altered items through her kits!!

The kit this month had all of these wonderful, soft Teresa Collins papers in it, and I just couldn't resist combining some of the whites, pinks and greys together to create a little girl layout. This one features a sweet photo of our cousin's little girl Addison.

I layered in lots of pieces and strips of the Teresa Collins papers from the kit along with lots of lacy white doilies to get a soft, sweet look. I then painted gesso patches and then stamped them and added bling for accents, I took a Teresa Collins banner and tag from the kit and accented them with some T.C. gem brads from my stash. I added the photo of Addison onto a distressed piece of papers and then started creating some flower layers.


 At the top corner of the photo, I made a foliage and swirl piece with a Spellbinder's die and then layered on a large flower from the Floral Add On and lots of the little Prima roses and leaves from the kit.
 For the Bottom Flower Layer, I created another swirl piece, layered on some more flowers from the Floral A.O. and kit and then tucked the Prima Resin Window from the kit into them and added a few more flowers to the other corner of the window and some of the Teresa Collins banners from the kit.
 I misted one of the Prima Canvas pieces from the Embellishment A.O. and added it to the photo corner.

 Cut the "It's The Little Moments That Make Life Big" journaling from the Kaisercraft paper in the Embellishment add on and staggered it on, and then topped of the look with a set of Ice Glitter Glass Butterflies from my Etsy Shop for dimension.

And for my fourth reveal project, I created a layout that features a photo of my God Child, Michelle and her Fiance that my son took, and created a shabby chic, romantic layout.


I used a bottom layer of Kaisercraft paper and the gorgeous die cut paper from the kit. I loved the edging on the die cut piece and water distressed it to give it a soft, distressed look.


I added on a piece of corrugated board that I painted with white gesso, inked and then added patches of Teresa Collins Glitter and seed beads for amazing texture and visual interest.

Here you can see the seed bead and glitter detail. I used the Rub Ons from the kit to add an accent at the top of the photo corner and then added one of the Prima roses and crystal pieces from the Embellishment A.O.


 I took a piece of Dusty Attic from a previous month, cut it apart, misted it with layers of color, added one piece to the top corner, and added on flowers from the kit and the Floral Add on.


 I added the larger piece to the bottom corner, and then created another flower layer with lots of flowers from the kit and Floral Add On.

I used a stencil to create a beautiful raised pattern with modeling paste and paint, then layered a doilie next to it, and then cut out  the "Live what you love" piece from the paper in the Embellishment A.O. added a mini rose and crystal piece from the same A.O. and then added dimension using a the pair of English Tea Rose Butterflies that I created for the kit.

I just fell in love with all the soft, romantic elements to this kit! Thank you for stopping by for reveal, and I hope that you have been inspired to create something beautiful for yourself!! Huge Hugs, ~Renea